
--Techknitter
R2D2 knits
R2D2 knitting


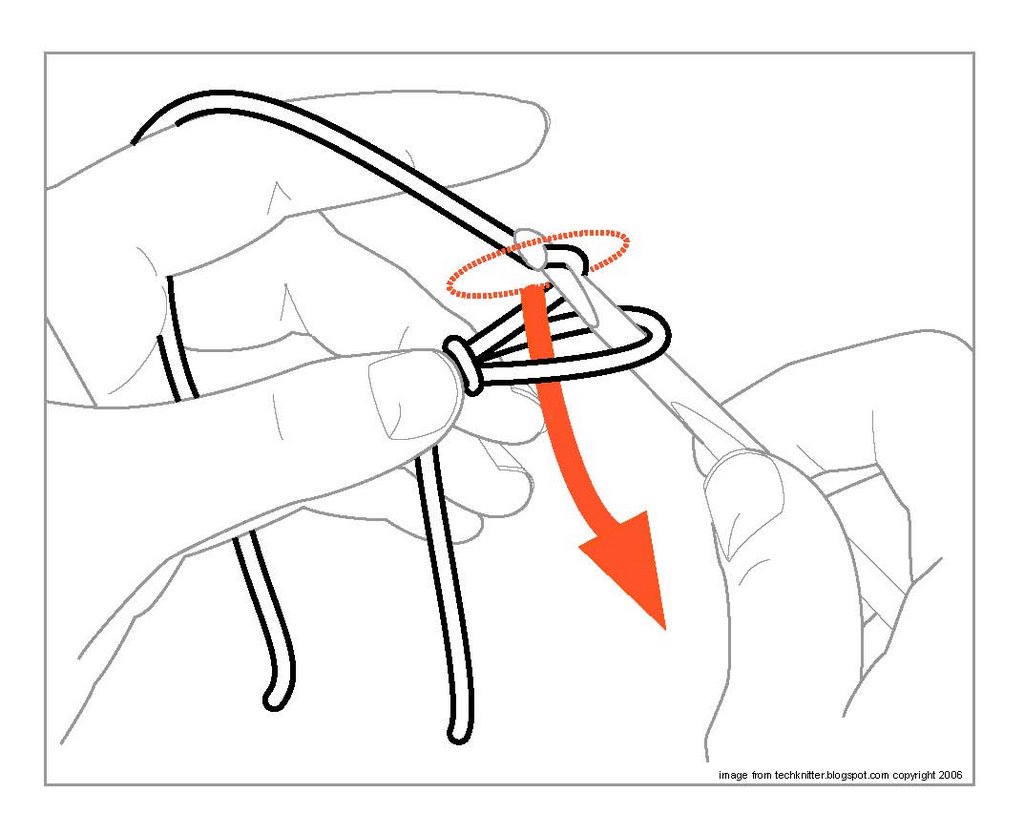
 The right needle inserts into the stitch at the tip of the left needle, and catches the standing yarn (green) "up from under." The tip then travels out of the loop along the path of the red arrow carrying the snagged standing yarn, which enlarges and becomes a new loop on the right needle.
 You won't get too far with this mistake--it's too hard to catch the standing yarn if you've held it in front of the left loop while trying to snag it from the back with your right needle. That doesn't mean you won't drive yourself nuts trying, though.
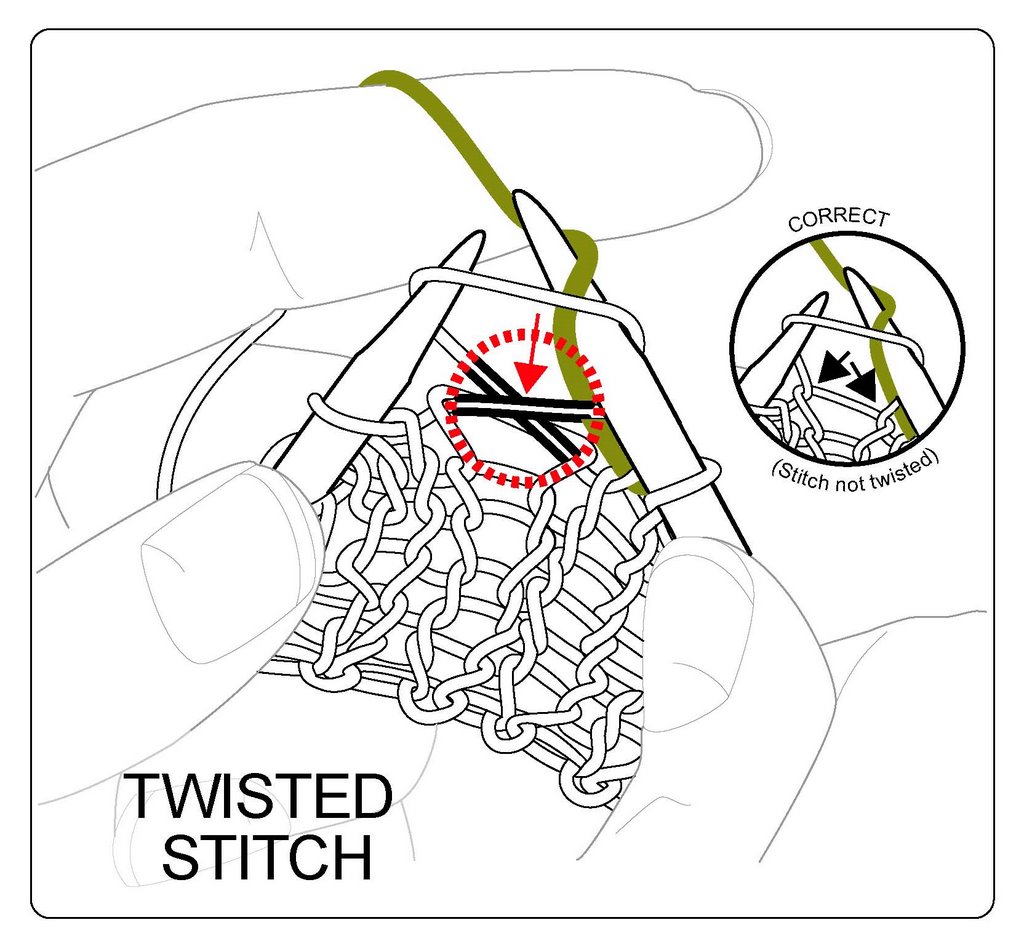 There are two ways to create this problem: Either the stitch was already sitting twisted on your left needle when you got there (because you inserted the tip of the right needle wrong when you made the stitch on the row below), OR you inserted the right needle wrong on this row (the correct way to insert the right needle into the left stitch is from the front, over the right arm in a left-to-right "hooking" motion .Either way you got there, though, if you see something happening like the illustration above, you've got a problem. Take it out and do it again.
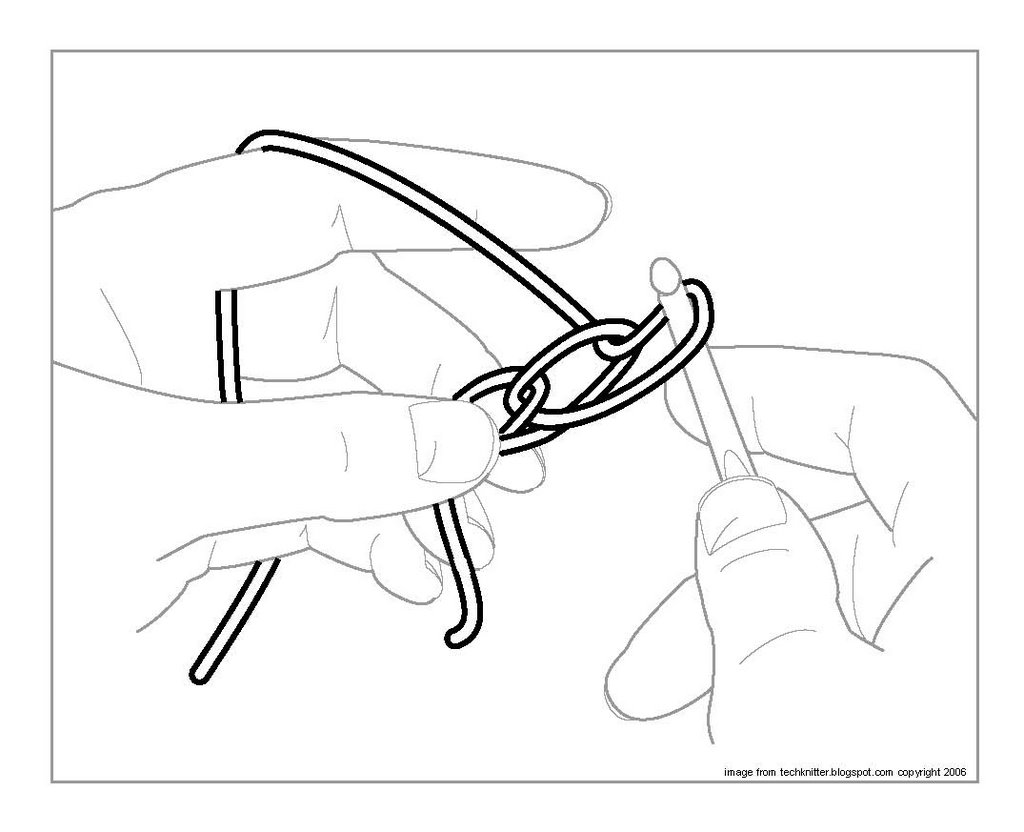
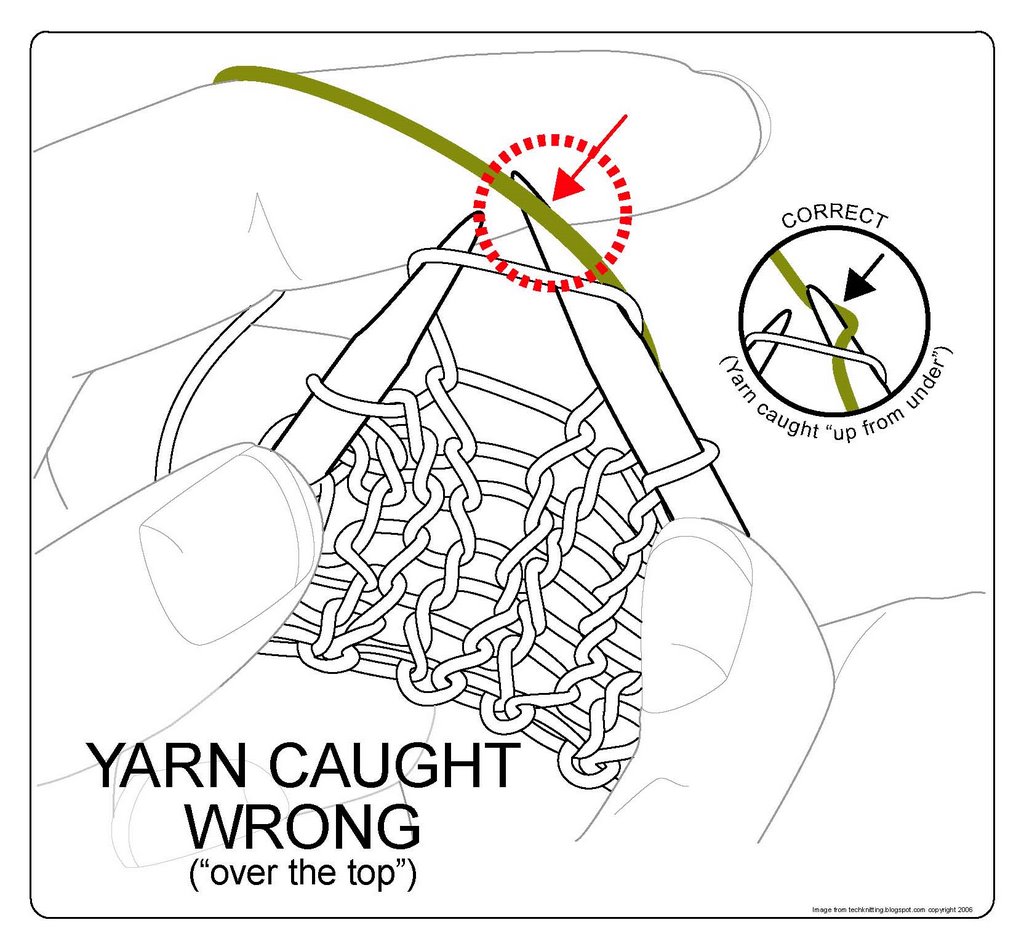 This, too, is a very popular error, especially when you first learn to knit, what with learning to control the needles, the yarn and your non-dominant hand (all at once). It's easy to make the mistake of catching the standing yarn "over the top" instead of the way it should be: "up from under." If you see this, take it out and do it again.
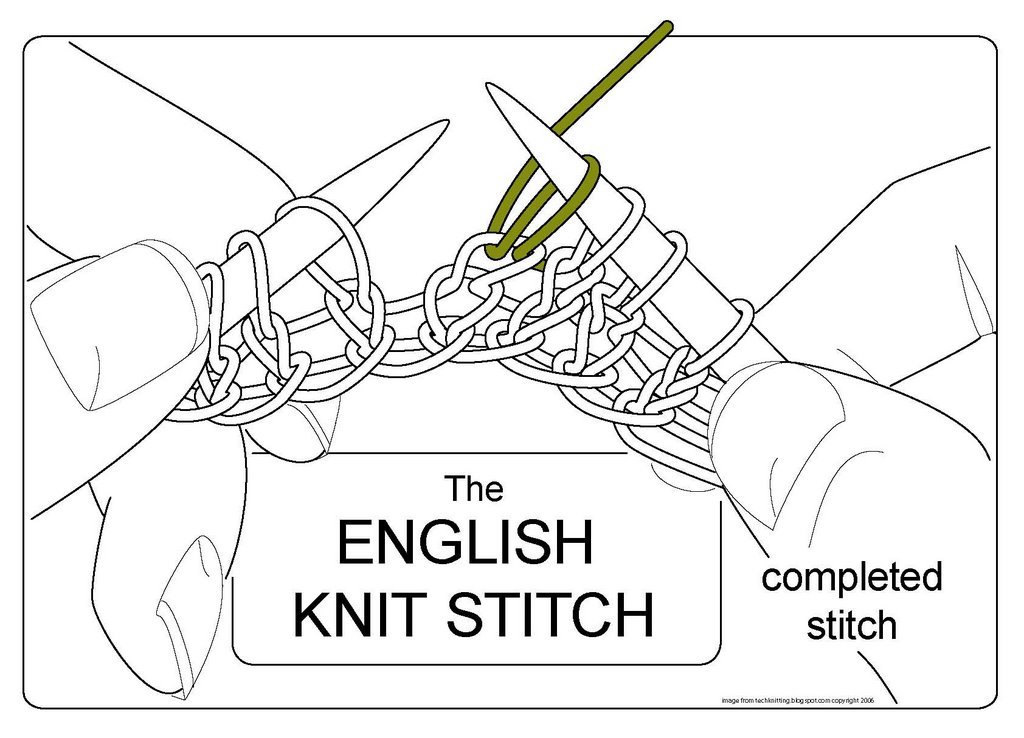
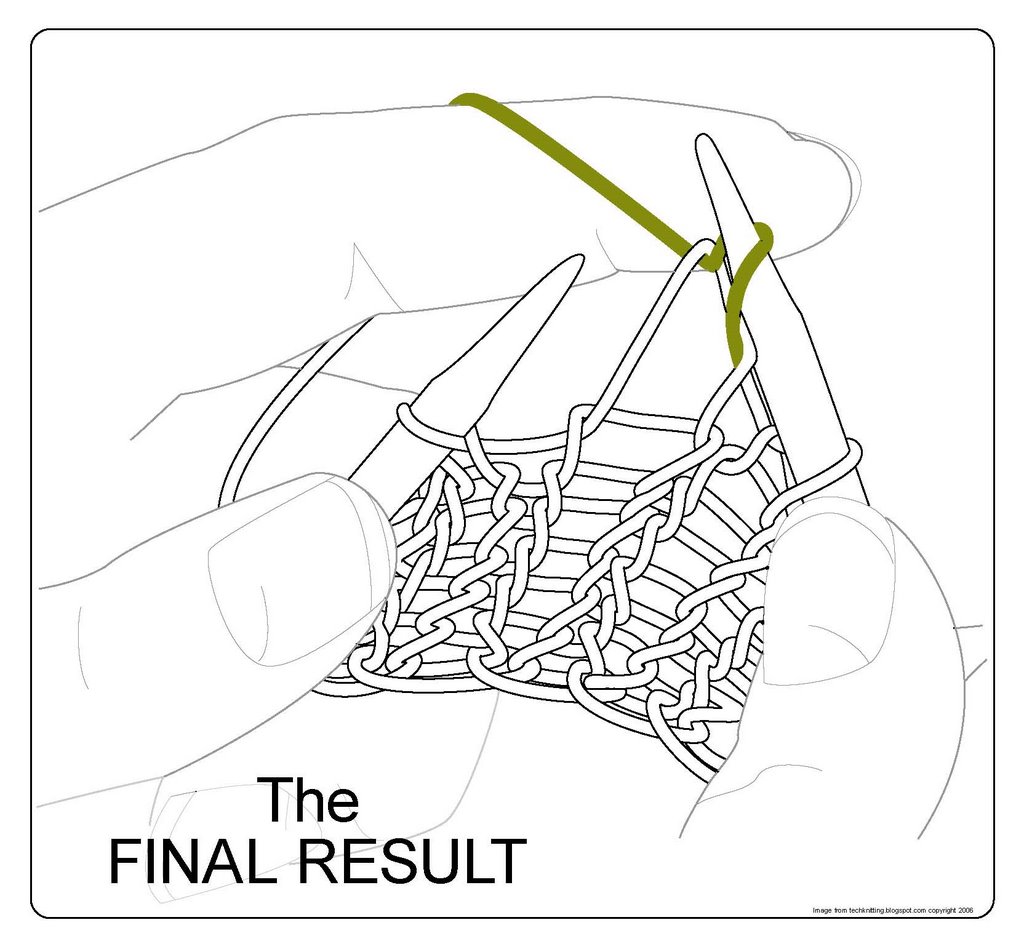 If you got everything just right, this is what the stitch should look like when you're done.
 In all of knittingdom, there are only 2 stitches: The KNIT (K) stitch and the PURL (P) stitch. (Well, perhaps there are 3? A yarn over (YO) is neither a knit nor a purl. On the other hand, a YO may not be a stitch at all, so maybe we are back to 2?)
As soon as you master these 2 (3?) stitches, you can make anything at all in all of knitting; cables, picots, stockinette fabric, garter-stitch fabric, lace. This all seems simple, and, in a zen-like sort of way, it is. However, the complications soon start cascading and obscuring all.
The first complication stems from the split between knitting's two main divisions: continental knitters who carry the working yarn on their left hands, and English knitters, who carry the yarn on their right hands.
Knitters argue about which method is "better." Speed records are set by both kinds of knitters. I believe the best way to knit is the way that you, personally, prefer. The next 4 posts will illustrate both continental and English knitting and purling--if you don't already know how to do these, you could try them and make up your own mind.
But before the how-to posts, THIS post is about how the continental style and English style differ, and why handedness (left-handed, right-handed) has only a little to do with which style will work better for YOU.
In all of knittingdom, there are only 2 stitches: The KNIT (K) stitch and the PURL (P) stitch. (Well, perhaps there are 3? A yarn over (YO) is neither a knit nor a purl. On the other hand, a YO may not be a stitch at all, so maybe we are back to 2?)
As soon as you master these 2 (3?) stitches, you can make anything at all in all of knitting; cables, picots, stockinette fabric, garter-stitch fabric, lace. This all seems simple, and, in a zen-like sort of way, it is. However, the complications soon start cascading and obscuring all.
The first complication stems from the split between knitting's two main divisions: continental knitters who carry the working yarn on their left hands, and English knitters, who carry the yarn on their right hands.
Knitters argue about which method is "better." Speed records are set by both kinds of knitters. I believe the best way to knit is the way that you, personally, prefer. The next 4 posts will illustrate both continental and English knitting and purling--if you don't already know how to do these, you could try them and make up your own mind.
But before the how-to posts, THIS post is about how the continental style and English style differ, and why handedness (left-handed, right-handed) has only a little to do with which style will work better for YOU.
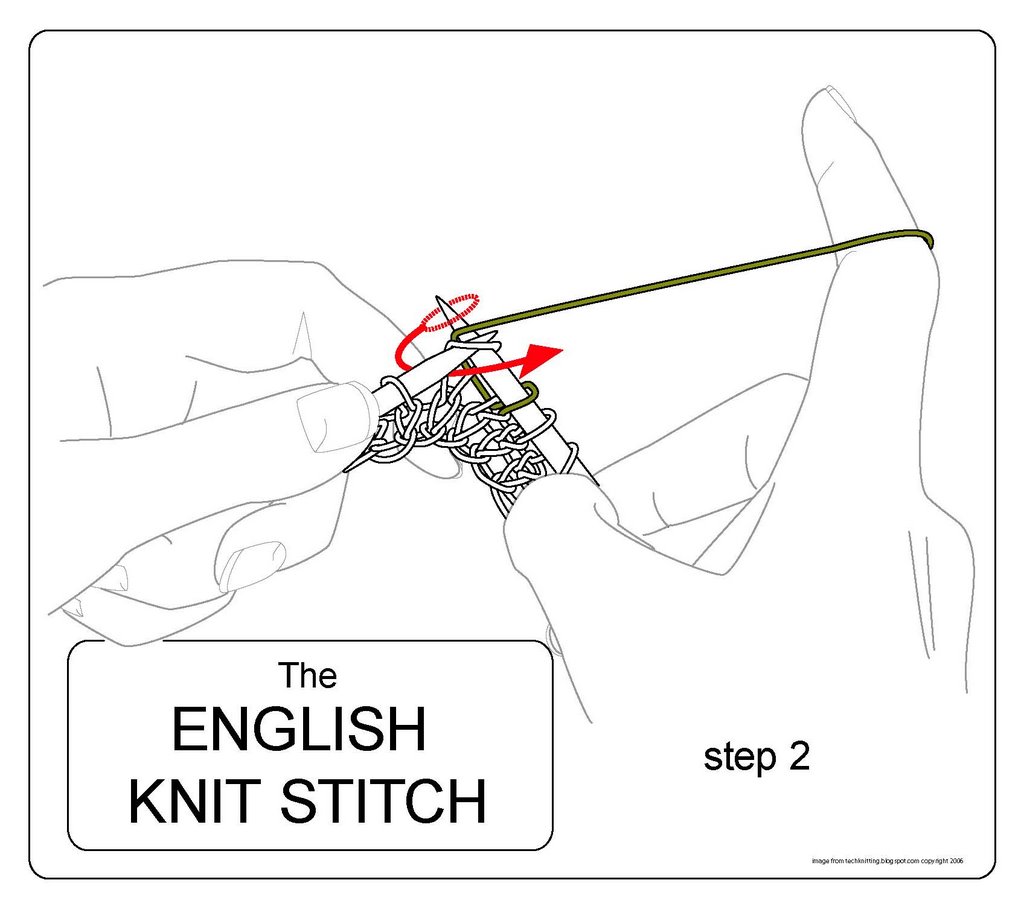
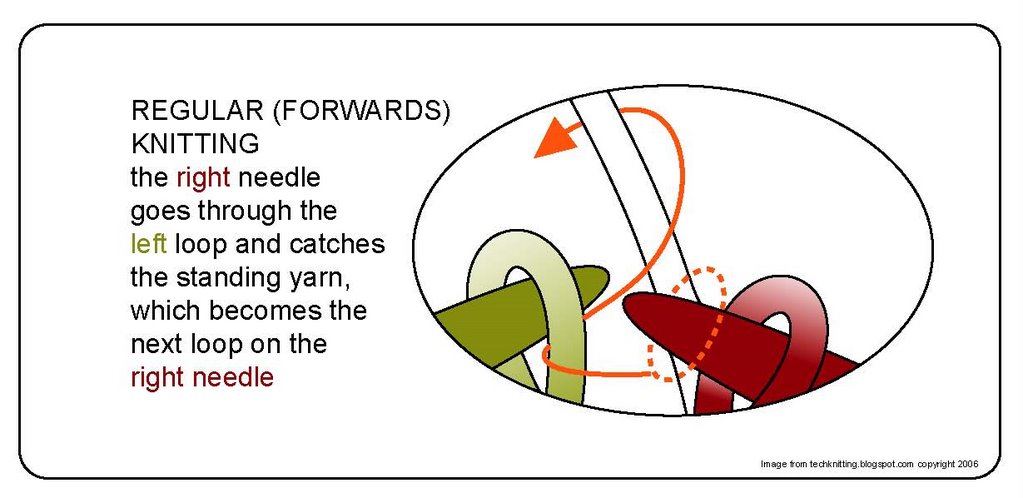 *the loop to be worked is held at the very tip of the left needle
*the tip of the right needle reaches through that loop, snags the standing yarn "up from under," and pulls that snag through the left loop.
*by this act, two things happen simultaneously: first, as the right needle draws the snag through the left (old) loop, the snag enlarges to become a new loop, second, the new loop is transferred to the right needle.
*the loop to be worked is held at the very tip of the left needle
*the tip of the right needle reaches through that loop, snags the standing yarn "up from under," and pulls that snag through the left loop.
*by this act, two things happen simultaneously: first, as the right needle draws the snag through the left (old) loop, the snag enlarges to become a new loop, second, the new loop is transferred to the right needle.
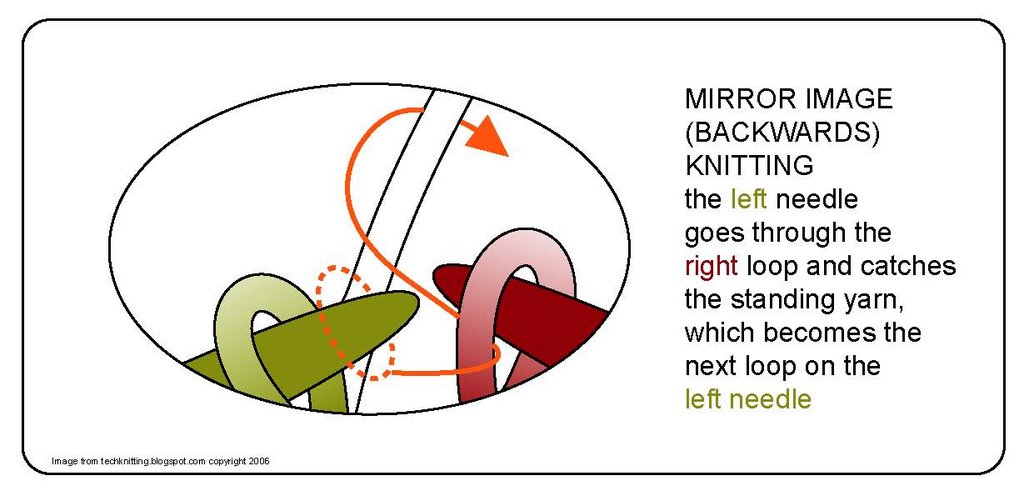 What some call "left- handed knitting" is actually MIRROR-IMAGE ("Backwards") knitting: using the left needle to draw a new loop through a stitch on the tip of the right needle. This transfers the new stitch onto the left needle and generally leaves the new stitch oriented backwards--that is, left arm forward. The act of supplying the yarn also changes hands, with the right hand carrying the standing yarn in continental knitting, and the left hand supplying the yarn in English knitting.
There are knitting teachers who use a mirror to teach this way.
What some call "left- handed knitting" is actually MIRROR-IMAGE ("Backwards") knitting: using the left needle to draw a new loop through a stitch on the tip of the right needle. This transfers the new stitch onto the left needle and generally leaves the new stitch oriented backwards--that is, left arm forward. The act of supplying the yarn also changes hands, with the right hand carrying the standing yarn in continental knitting, and the left hand supplying the yarn in English knitting.
There are knitting teachers who use a mirror to teach this way.  A: For nearly 10 years I've been trying to find the correct format for getting the "knitting tricks" viruses out of my mind (and into yours!) I twice started books (and got several chapters into each) but the book format lacked a feedback loop, and there was no way to keep updating. I don't have much to show from those attempts except 1) several bulging files; 2) a bunch of sample garments (many already worn out) and 3) a knowledge of ADOBE ILLUSTRATOR. Over the years, Illustrator has taken over my mind to the extent that when I see a highway sign, for example, I imagine how I could reproduce it.
 Needles come in radically different point styles. It took several years of knitting before I settled on my favorites (Boye needles, now harder to find than ever...). These are aluminium needles with a relatively long, somewhat concave, ball-pointed tip. The needles I go slowest on are those with short, convex, rounded tips. Yet, when I'm knitting with superwash wool (very prone to splitting), I go faster with a rounded tip because it is less likely to split the wool.
 From the back, you can see that a crocheted chain does NOT look like knitting--it has "bumps." Slide your knitting needle under the bumps as shown by the arrows.
 The result should be loops on your needle, ready to knit up, which look like this:
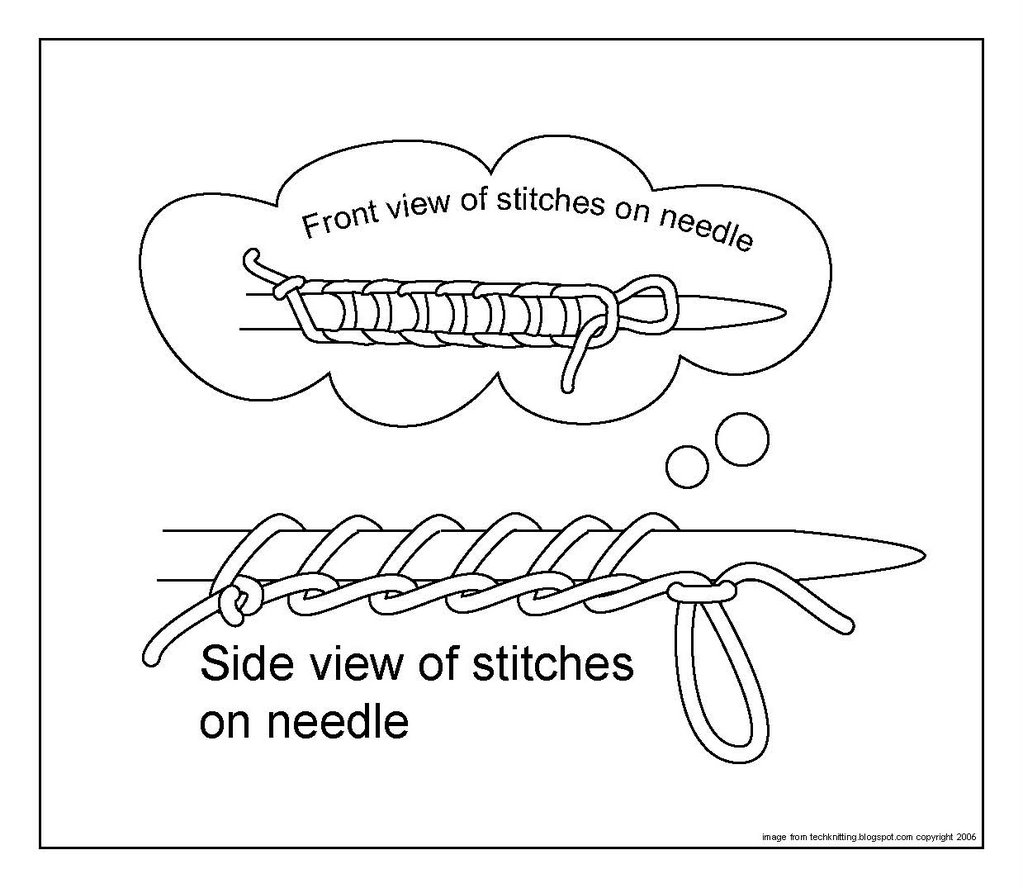
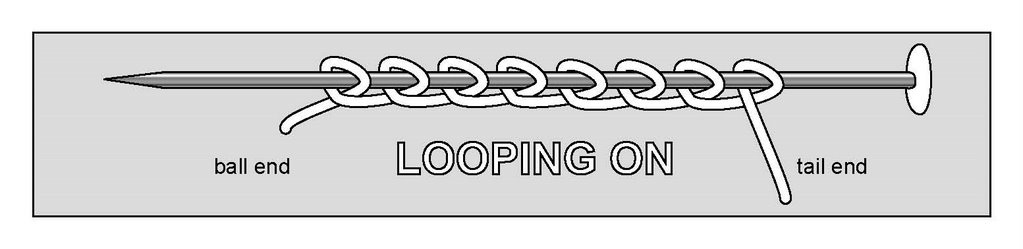 Gardeners say "a weed is a plant out of place." In your lawn, that purslane is a pest, but in the hands of a Italian chef, it's a tasty side dish. It's the same with looping-on. Looping-on is a horrible way to cast on a heavy sweater and a dismal way to start circular knitting. But in the right place, looping on is a valuable technique--the trick is knowing where to use it.
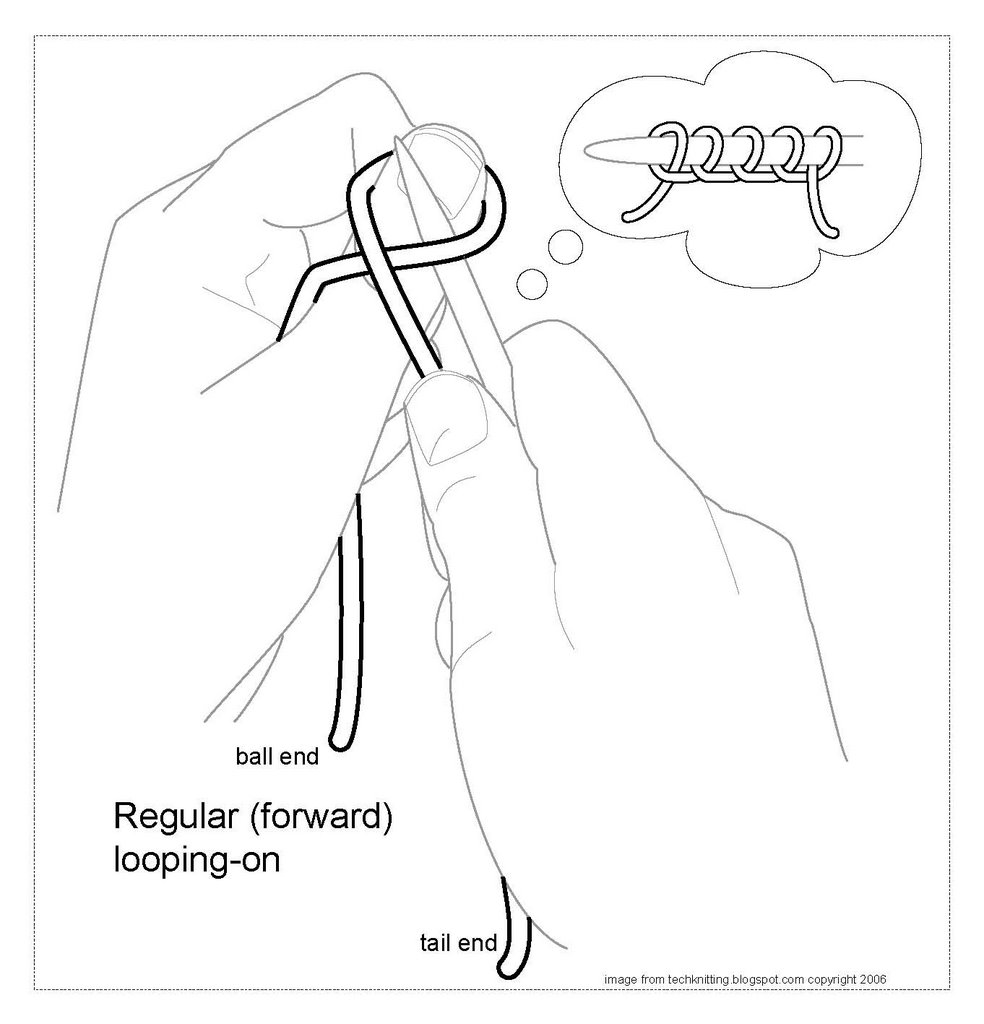 Not a lot to say: Follow the illustration above to get regular (forward) looping-on, follow the illustration below to get twisted (backwards) looping-on.
 Two provisional stitches (slip knots) have been made in the tail end of the yarn, and placed on the left needle. Insert the right needle into the space BETWEEN the provisional stitches. With the right needle, catch the ball end of the yarn "up from under." This wrap around the right needle will become the first "real" knit-on foundation loop.
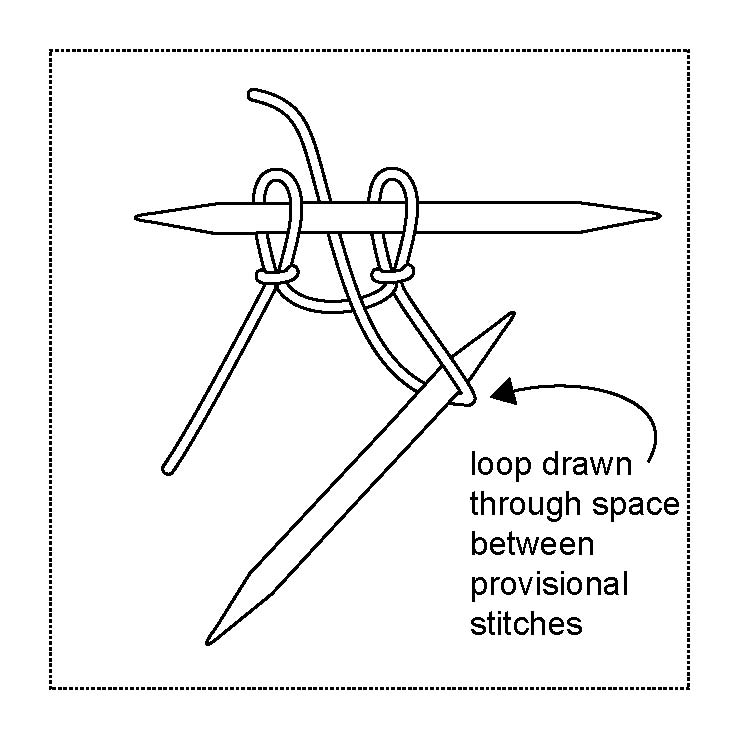 Using the right needle, draw the loop through the space between the two provisional stitches.
 Transfer the loop (drawn up large) from the right needle to the left needle. Be careful not to twist the loop.
 Snug up the transferred loop. Insert the right needle into the space between the two previous stitches, catch the ball end of the yarn and repeat steps two through four until you've cast on the correct number of stitches. At the end of the process, don't forget to unravel the two provisional stitches.
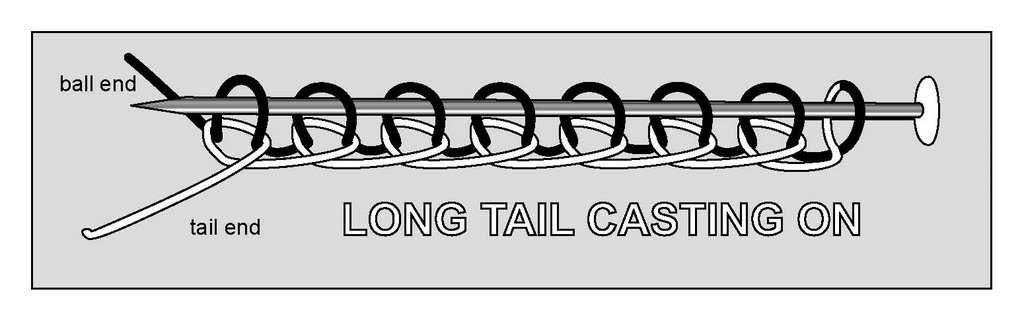
 1) make a loop with the tail end of the yarn laying OVER the ball end of the yarn,
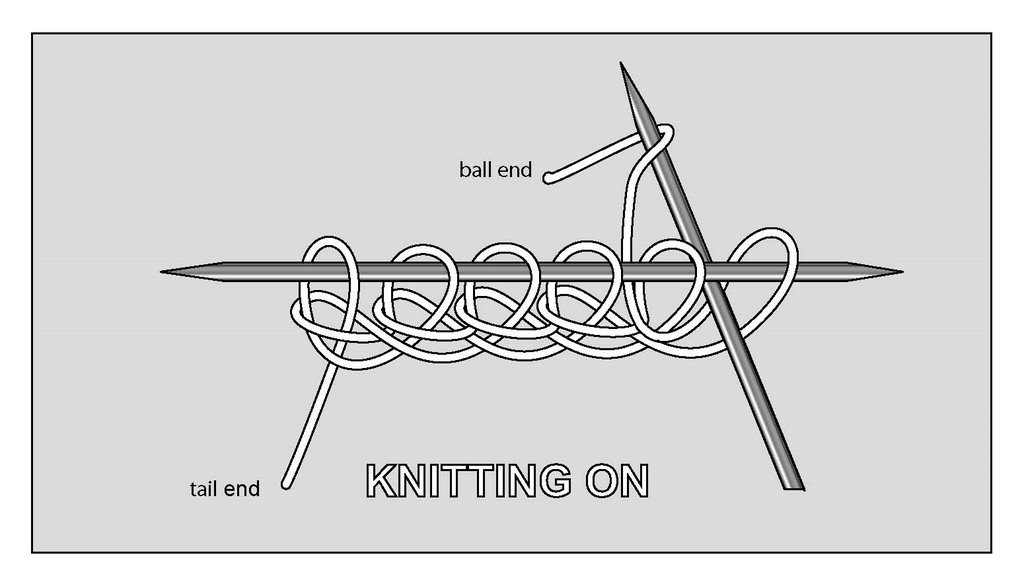
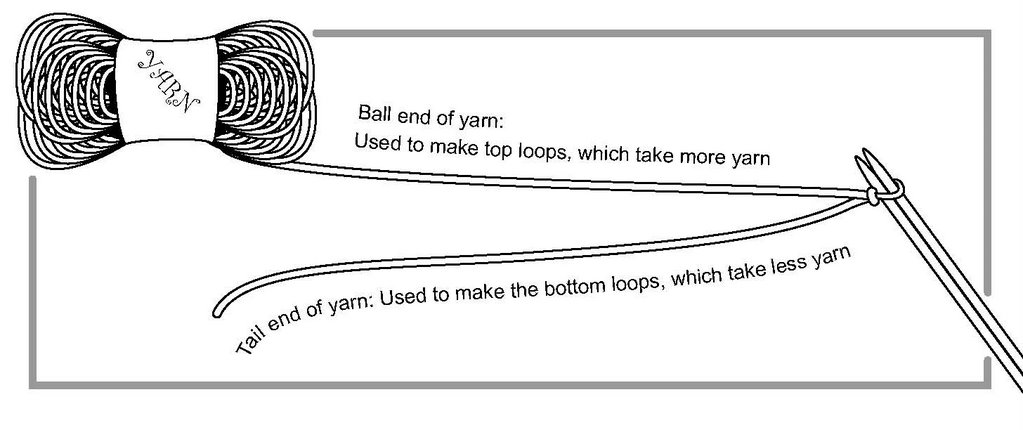 See, with long tail casting on, you're making a looped foundation row at the bottom, and putting a first row of knitting on your needles, both at the same time. The top loops are a lot bigger than the bottom loops and take up a lot more yarn. So, what makes sense is to use the ball end of the yarn to create the bigger top loops, and the more limited tail end to make the smaller bottom loops. My casting on instructions are very specific about which is the ball end of the yarn, and which is the tail end.
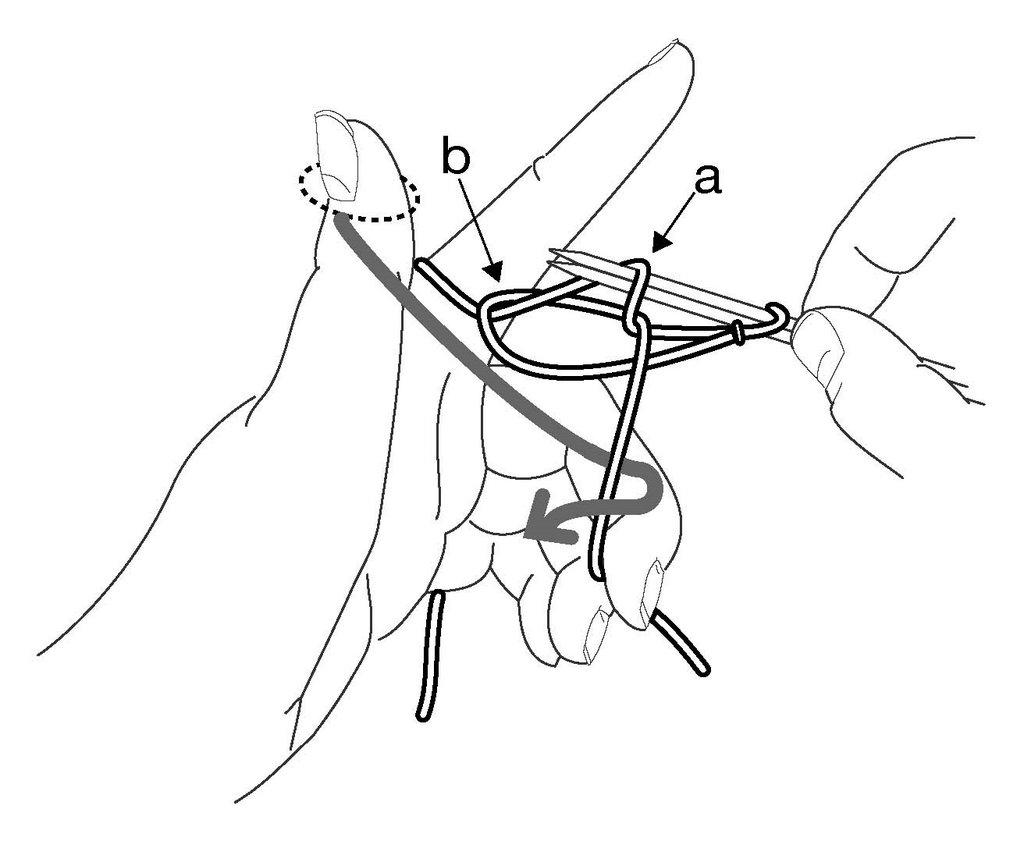
 The yarn passes twice through your fingers. You tension the yarn by pressing together the little finger and the ring finger, as well as the pointer finger and the middle finger.
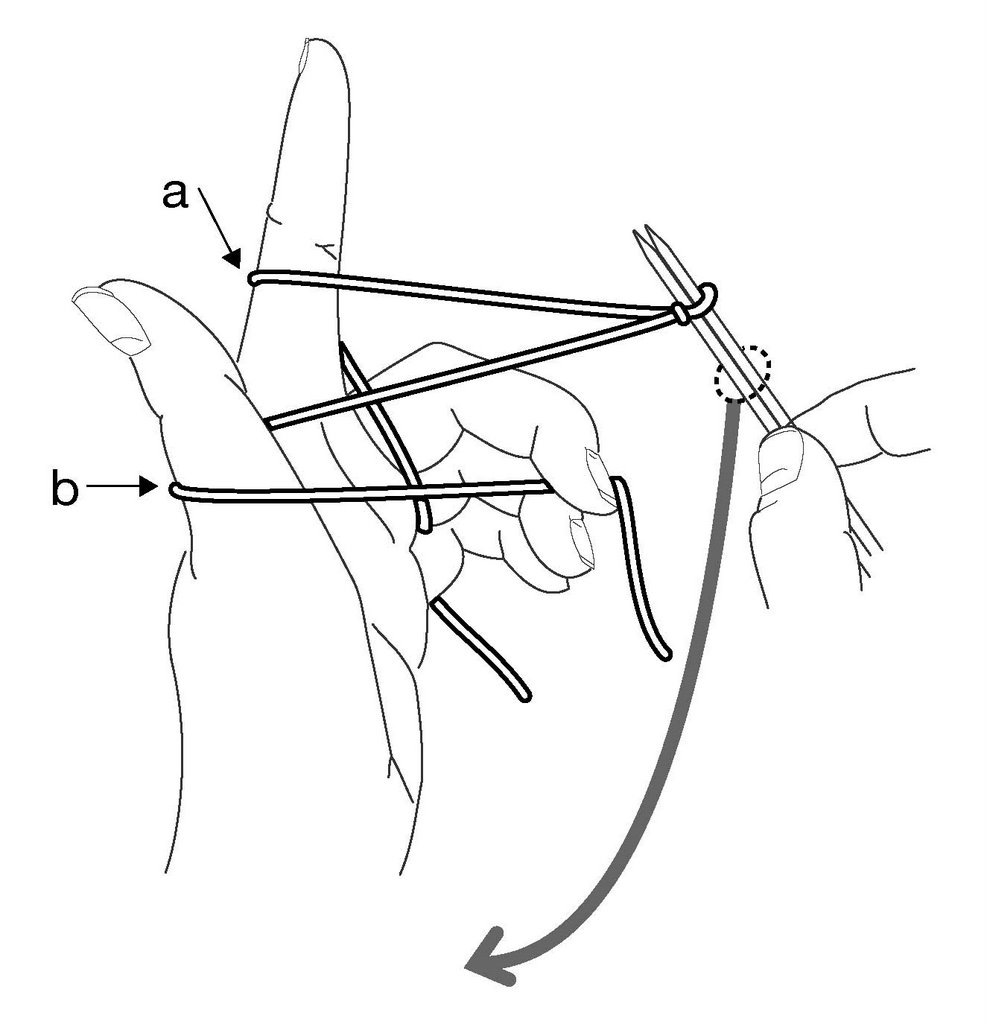 Your ring finger has a lot to do. The base of your ring finger is pressing against the base of your little finger to hold the ball end of the yarn in tension. The top of your ring finger is pressing against your middle finger to hold the tail end of the yarn in tension.


 Final tangential thought: Although slip knots are not a great way to start your knitting, they have many other uses (such as making provisional stitches intended to be unraveled.) But, slip knot's highest and best use is tying balloons onto children and vice versa. If you practice this skill you'll be the hit of the next birthday party as the "balloon mommy."
 By contrast, woven fabric is made of cut lengths of thread, which have no connection (other than proximity) to their surrounding threads.
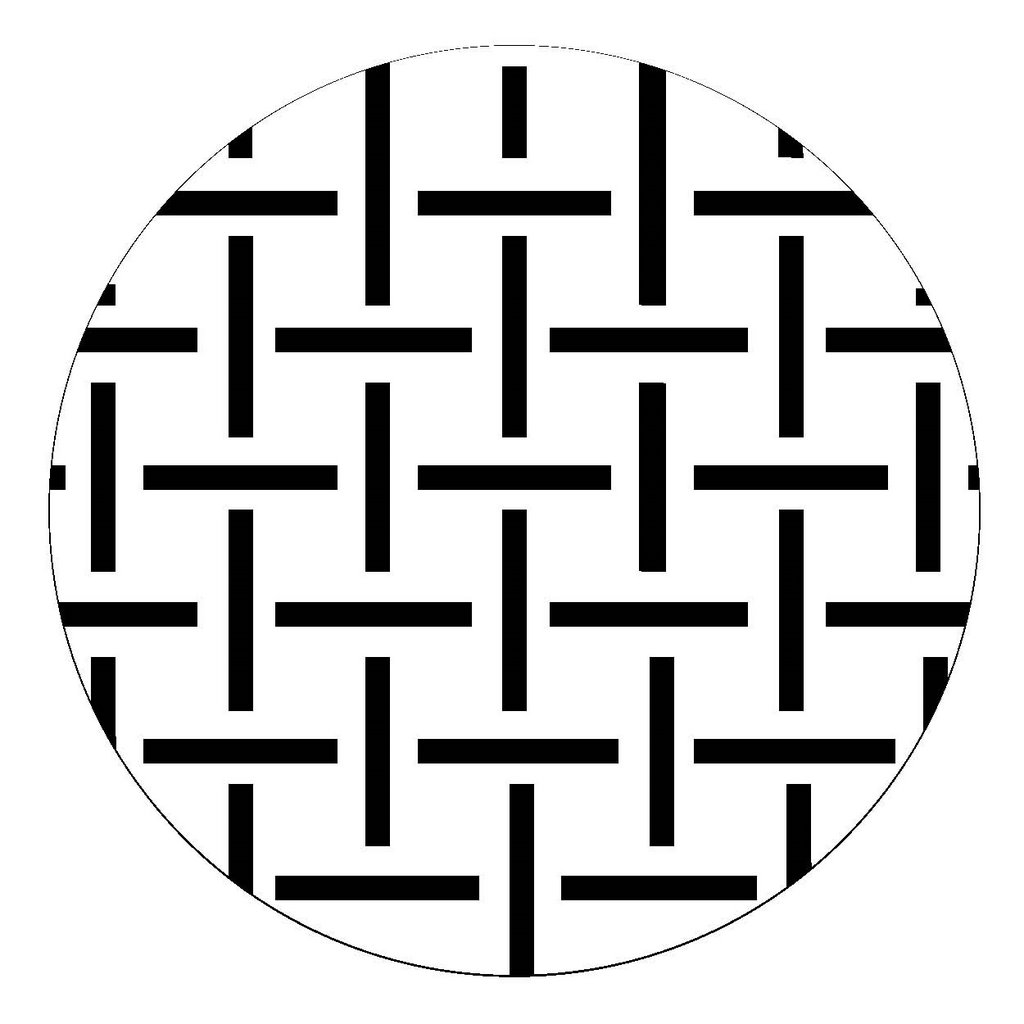
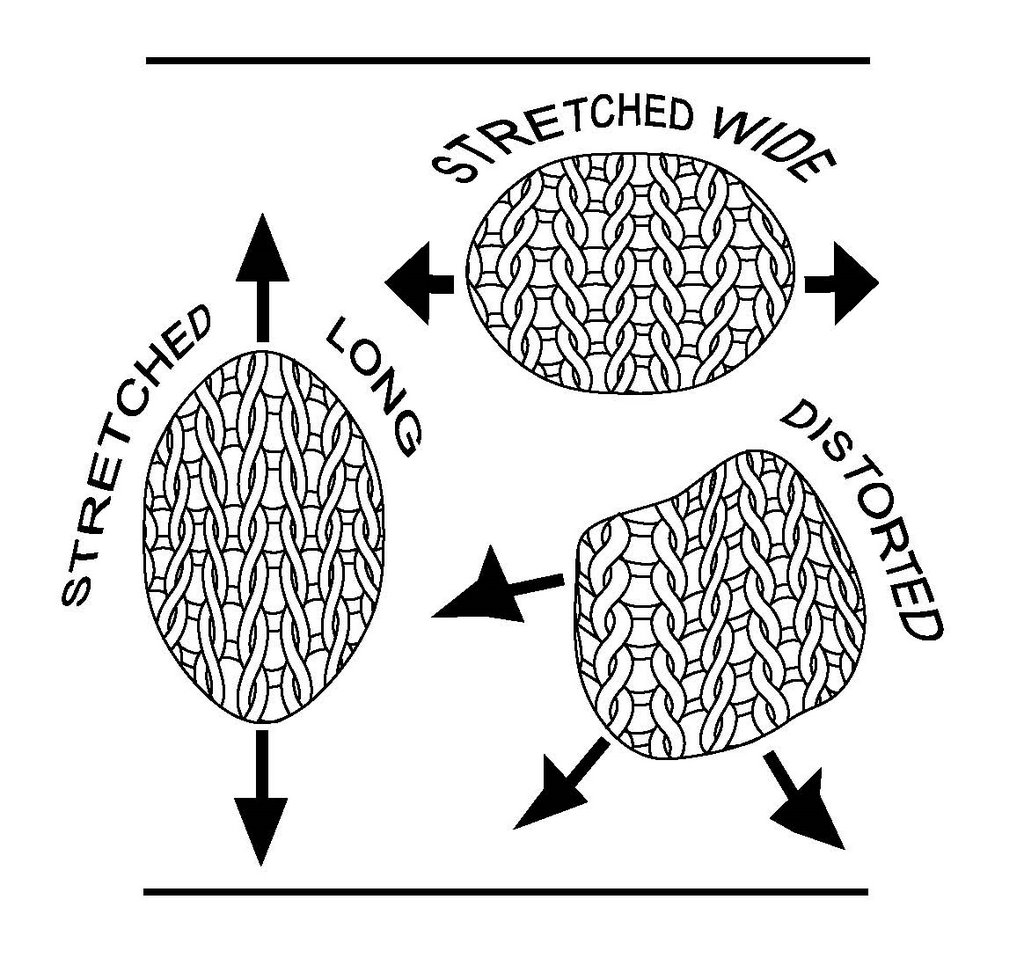
 A third advantage of knitting's row-and-column structure is that knitting can "run out" in the columns. Once you've seen a run in a nylon stocking or a T shirt, or the laddered mess above a dropped stitch, you may not think of this as much of an advantage, but it is. Drop a stitch down on purpose and you can correct a mistake 20 rows back without ripping back, row by row. Once the mistake is fixed, you can hook the run back up with a crochet hook, ladder by ladder, to the top.
 Here's a link to TECHknitting index for many more articles on correcting errors.
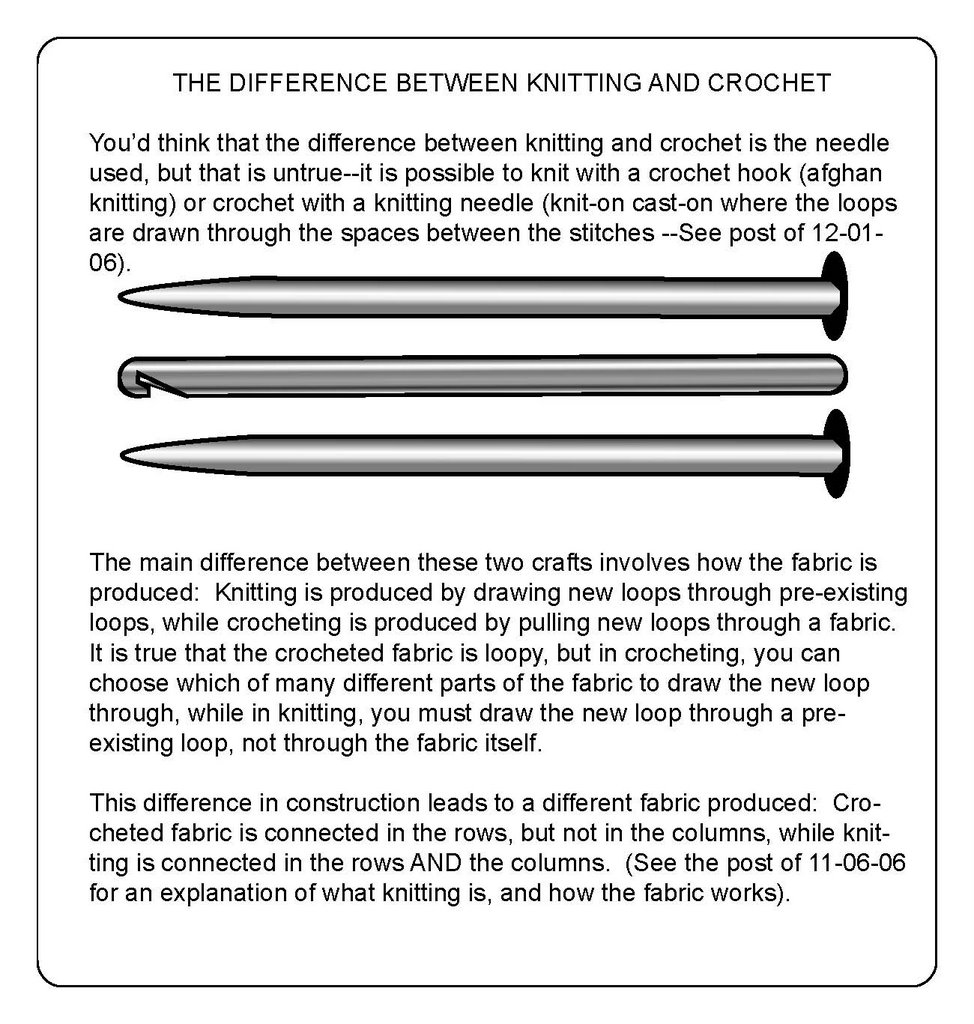