 |
| Pretty, aren't they? |
I-cords are useful and attractive, but they can only really be knit in one color, and can be rather stiff. Today's method of making cords with a crochet hook can be made in different colors--very pretty! This cord is based on a crocheted chain stitch, but two strands (or more) are used. Like the chain stitch cord on which it is based, this is very strong--much stronger than the single strands of yarn from which it is made. In two strands, it is thinner than I-cord, and much faster to make, but obviously, the more strands (and potentially, the more colors) then the thicker (and slower) it gets.
If you remember plastic-lace "lanyards" from summer camp, these cords have a similar look, but they are worked with loops and a running yarn, rather than knotted out of cut lengths.
The motions
Here's a "motions" video of working a two-stranded cord, hopefully a help with the how-to's. It demo's four things.
- Two ways of holding the yarn--standard grip and reverse grip.
- Two different stitch mounts ("S" and "C") which are also explained in illustrated detail, below.
Two-strand cord in two different colors
Start the first color as a twist over your crochet hook. A twist is the easiest way to start practice making cord because it pulls out very easily. (The very next post will have much more about cord endings and beginnings.)
As shown from the front (left illustration) the tail descends over the running yarn (running yarn = yarn running back to the ball). If you rotate the twist around your hook so it's seen from the back (right illustration) the tail descends behind the running yarn. It looks unsecure but as soon as you pull a new loop through, the twist flips over, while the next loop made with that same strand locks the twist down--more about this below.
 |
| Technique: twist to start cord |
Follow the blue arrow to hook the second color (left illustration) and pull it through the first loop (right illustration).
 |
Two-stranded cord: second loop pulled through For better detail, click here to enlarge |
Taking a closer look at the path of the yarn, the "standard way" to mount yarn on a crochet hook is what I'll call an "S" catch: if you squint a little, the path of the yarn makes an "S" as it travels
- behind the stem of the hook from left to right,
- then comes forward around the stem from right to left,
- to then pass under the hook itself in that same right to left direction.
There is more about stitch mount below, in the section on yarn topology.
 |
This picture shows three things: --First, it shows the "S" mount position to grab yarn for the next loop (technique) --Second, it shows "crossing over," where the green yarn crosses in front of the white to start the next color-cycle. --Third, it shows how the starting twist comes to be locked onto the running yarn when working the first "real stitch" in that same color, as mentioned above. |
The 2-color cycle starts anew when you "cross over" the first (green) yarn onto the hook, and pull the first color through the second (white), as shown above.
Continue in this manner, "S"-mounting the yarn, and drawing up first a loop of A, then of B.
Here is the cord in real life
 |
2-stranded cord worked in green and white showing front (left) and back of same cord |
At the end of the cord, draw either yarn--doesn't matter which one--through the last loop and tighten. For now, we leave the cord there, but there will be more about cord-ends (and cord beginnings) in the very next post.
Three-color cord
Similar in its manner of work to 2-color cord, only just adding another color to the work (left illustration) before "crossing over" the first color through the third (right illustration).
 |
Three-stranded cord: the first two strands (red and pink) are worked as for a two-stranded cord, followed by a third strand (yellow) worked in the same manner. Then, the cycle starts anew when the first color (red) "crosses over" to be drawn through the last color (yellow). |
Here is the cord in real life.
 |
| 3 stranded cord worked red, pink, yellow showing the different side views |
Four-color cord
Same as three-color, but draw through a fourth strand before "crossing over" to begin the next color cycle.
 |
Four-stranded cord: the first three strands (red, yellow, red) are worked as for a three-stranded cord, followed by a fourth strand (black) worked in the same manner. Then, the cycle starts anew when the first color (red) "crosses over" to be drawn through the last color (black). |
Four-stranded cords most resemble the plastic-lace lanyards of summer camp, and a quick look at an end shows why: there are four yarns clasping one another in turn, a sort of four-part handshake. It's true that the photo shows the cord when the work is over and the ends have been cut, but the loops in the work have the same "clasping around-and-around" structure.

A four-strand cord forms a sort of a box-shape, and each face of the shape actually looks quite different. The end shown above belongs to a four-strand cord worked with two reds, a black and a yellow. Here is a photo of the different faces of that cord.
 |
| The different faces of 4-strand lanyard |
As practical consequence, if you want a particular color to show more, use more of it (as the two reds in above example). That way your wanted color shows no matter which way the cord turns.
Tension
Too tight is no good: the cord looks cramped if each loop is drawn up very tightly. Too loose is no good either. Two-stranded cords always lay rather flat, but when you get to 3- and 4-stranded cords, a too-loose cord has no bounce. With a "just right" tension, 3-stranded work has a prism cross-section △ and 4-stranded, a box-profile ▢, both with hollow cores. If your cords are a bit flat, tightening up will make them more 3-D. Vary the crochet hook size until you get the result you like, or vary your grip, as shown in the video (or both).
Yarn topology--a geekish interlude with musings on warp knitting
In the illustrations above, I showed always catching yarns around the hook as for standard crocheting, with the yarn mounted on the crochet hook in "S" orientation.
If instead, you draw through without winding the yarn around the stem of the crochet hook, the path of the yarn more nearly resembles a letter "C." (BTW: both "S" and "C" mounts are shown in the short opening video.)
 |
| Technique: "C" mount. Compare to "S" mount |
The below illustration shows the possible combinations of "C" and "S" mounts in a two-stranded green and white cord where the green is always the first yarn knit.
- If the first yarn is mounted "S-"wise and the second "C-"wise you get open loops. The loops resemble a lower-case "n," meaning, they look like knit stitches: the tails enter the stitch from opposite sides, and the bottom of the stitch is open (not twisted shut).
- If both yarns are mounted "C-"wise, the first yarn (green) is twisted into an "e" loop: the loop is twisted shut, with a tail like that below the loop of a lower-case "e," but the second yarn is open--an "n" loop.
- If both yarns are worked "S-"wise, the first yarn is an "n" loop but second yarn (white) is twisted into flipped "e" loop, like a backwards lower-case "e."
- If the first yarn (green) is mounted "C-"wise and the second yarn (white) is mounted "S-"wise, you get two "e" loops
 |
The four mount variations possible in a 2-strand cord. "S-C," upper left. Compare the structure with open lap warp knitting, below "All-C," upper right "All-S," lower left "C-S," lower right. Compare the structure with closed lap warp knitting, below Click here to enlarge, click here to view "all-S"cord IRL, previously shown above |
Warp knitting is beyond the normal ken of this blog because it is not a hand-knitting technique. It is always (well, almost always, I guess...) done by giant industrial knitting machines with hundreds, or even thousands of needles: a separate needle for each of the columns of long warp threads (video link). However, if you compare the structure of open lap warp knitting (below, left) to "S-C" cord (upper left, above) or closed-lap warp knitting to "C-S" cord (lower right, above) why, would you look at that! You see yarns following essentially same paths.
 |
Two forms of warp knitting, in which each column gets a separate strand of yarn (like the long warps of weaving). Compare the open-lap structure to "S-C" cord: they share essentially the same "n" loop structure. Similarly, compare closed-lap structure to "C-S" cord: they share essentially the same "e" loop structure. Illustration based on original source material in Journal of Industrial Textiles |
Close comparison reveals the 2-strand cord is very similar in structure to warp knitting. So, despite warp knitting being unusual for hand-knitters, now you can say that you have done it, or at least the two-column-wide, first-cousin version. Warp knitting by hand! And with a crochet hook, no less! Achievement Unlocked in "Call of Knitting!" ("League of Knitters?" "Grand Knit Auto?")
In three-color cord, I again showed the cord made in standard "S" orientation.


When you put all three components of the "all-S" 3-strand cord together, you get something complicated: two n-loops (red and pink) with an e-loop pulled over (yellow). This is it below (and yes, this took a hot minute to illustrate, and no, I'm not going to show the four-strand cord--you are on your own!)
 |
| Click here for larger window. Side views of this cord were shown above, click here to see them again. |
So, is three-strand and four-strand lanyard warp-knitting also? There is certainly a subset of warp knitting performed circularly: circular warp-knitting machines make cord and cord-casing for everything from rope to implantable tubular medical fabrics. Their method of operation is different, using many needles, not just one, but the fabric being created are essentially the same as we are making here: looped fabrics, both "open" ("n") and twisted ("e") around a hollow core where adjoining stitches are worked from different "warp" (long) strands and each column is joined to its immediate neighbors. Topology suggests that the answer is "yes" (or at least "they're pretty darn close").
* * *
At this point, perhaps you are thinking that it's interesting and all about the warp knitting, but "what's the bottom line? How does all this orientation stuff matter?" Well, as we get further along, we will see this orientation again. For now, however, the immediate take-away is CONSISTENCY!
If you switch between "S" and "C" orientation at random, your cord will have a "broken" appearance where the pattern went off. This is a close-up of the back of the 2-strand cord from the "motions" video where the stitches randomly switched between "C" and "S" mounts as part of the demo. Random mounts = random appearance. Alternating color gives way to consecutive stitches along the edge. Random bars of white appear above the bottom border.

For every-day cord making, method of mounting yarn on the hook is knitter's choice. For each strand, choose a "C" or an "S" mount--whatever is easiest for you. After choosing, however, stay with whatever you picked to avoid a gnarly cord like the one above.
Cords and colors
Multi-color
So far, we've mostly used a different color on each strand.
- 3 strands, 3 colors[⓵ ➋ ⑶]
- 4 strands, 4 colors [⓵ ➋ ⑶ ➃]
But of course, this isn't the only possibility.
In three-stranded cord,
- two colors the same and one different also looks very well [⓵ ⓵ ➋ or ⓵ ➋ ⓵ ]
- The order of knitting the colors actually does make a difference, most obviously from the back, the upper sample is ⓵ ⓵ ➋, and the lower is ⓵ ➋ ⓵

In four-stranded cord,
- you can make three strands the same and one different [⓵ ⓵ ⓵ ➋] and again, where that oddball strand is placed in the order does make a difference to the overall look
- two sets of two colors; either staggered [⓵ ➋ ⓵ ➋] or clumped [⓵ ⓵ ➋ ➋] or
- two strands the same and two strands different, and again, either staggered [like the red-black-red-gold cord above--⓵ ➋ ⓵ ⑶] or clumped ( ⓵ ⓵ ➋ ⑶]
The more strands, the more possible color combos. Yet, pretty soon you realize that the more strands, the slower to make and the stiffer the cord.
Single color
 |
| 4-stranded single-color lanyard (left) vs. 3-stitch I-cord (right) |
Lanyard of fewer strands are generally quicker to make than I-cord (although YMMV, especially when going up the learning curve). However, quicker to make but...longer to finish. I-cords have one tail to work in per end, whereas lanyards have one tail per strand-- a three-strand lanyard yields 6 total ends to deal with vs. two total ends for an I-cord. Depending how you want to deal with the ends (next post), the time-advantage of one-color cords may well be with the I-cord. And, the more strands there are in the lanyard, the truer this is.
In terms of utility use, however, 4-strand lanyard has the advantage: it is more robust. It's much harder to unravel. It is more flexible and retains shape and bounce longer. (In fact, these are the very qualities that make warp knitting preferable to weft knitting where a more durable fabric is wanted.) For the drawstring of a rough-use garment such as a ski sweater, I would use lanyard rather than I-cord, especially if combined with a cord-lock (more on cord-locks below). Worked in the same yarn, and similar size needles/hooks, four-strand lanyard is about the same thickness as 3-stitch I-cord (photo, left) but thinner than 4-stitch I-cord (not shown). The lanyard is usually more elastic, as well, but this depends on how relatively tightly the cords are worked.
In terms of aesthetics, compare for yourself. The look is different and each single-color cord is a pretty little thing in its own right.
Keeping track
Just as with inconsistency between "S" and "C"mounts, inconsistency with grabbing the wrong color also makes a broken appearance. Maybe jot down your color progression so if (when!) interrupted, you can start right up again. Or, use alphabetical order to arrange the progression (blue-green-red-white for example).
If you do decide to make a one-color lanyard, then keeping track of your strand-progression is harder than if each were a different color. If you have good eyes, you grab the strand coming from lowest down. For more reminders, designate the strands by leaving just one naked, then clipping something different around the remaining strands--a paper clip, a safety pin, a twisty tie (there's that alphabetical order again!) Slide these attachments along up the yarn and out of the way as you draw more yarn into the cord.
Variety cords--worked flat
The two-strand cord made first was a flat cord, and you can work flat cords wider also, by adding in more strands. Like the two-strand cord, flat cords are also variants of warp-knitting, and perhaps more so in that most warp knitting is flat-knit. Because the strands on these cords never "cross over" to flip the cord shut into a hollow tube, these type of cords look less like lanyards and more like the "friendship bracelets" of summer-camp arts and crafts. Here is a three-strand cord which is flat and four columns wide--the center color (green) is worked twice for each single-working of the outer (pink and yellow) columns.
 |
A flat cord of three strands, but four stitches wide-- the center green color is used twice as often. Because of the "C" mounts when working the second half of the cycle (right to left) the loops in the entire cord lay "open" (not twisted). |
To make this cord, start as for three-strand cord but using a "C" mount for the last (yellow) stitch. Specifically, working from left to right,
- make an "S" loop of color 1, (pink), then draw through an
- "S" loop of color 2 (first appearance of green) then draw through a
- "C" loop of color 3 (yellow)
For flat cord, we now work back across the cord, this time working from right to left. In other words, do not "cross over" to start again with color 1 (pink) as you would do for three-strand lanyard cord, but instead
- through the yellow strand, draw a "C" loop of green (second appearance of green in the cycle)
The cycle ends with this second green, then starts again with an "S" loop of pink.
As a result of this back-and-forth across the width of the cord, the center color (green) zig-zags between borders of the two outer colors.
* * *
Really, there is just no end to the color patterns and method-variations of these cords. Try bringing stitches around the back when "crossing over" for lanyards. Try to figure out how to trap the running yarn in the hollow center of a three- or four-strand cord (experiments in topology + friction). Try making flat cords with more strands and colors--the wider, the more "woven" the cord looks. And, wouldn't a bead look pretty on each outer loop of the flat cord?
Scrap-yarns in different colors + a hook = endless entertainment for long rides.
Uses
Drawstrings for grownup clothing or drawstring bags, or ties for blousy-type summer knits are obvious uses for lanyards and cords. If you've lost the drawstring from your sweatpants or pj's, a two- or three-strand lanyard is a quick replacement. (Hint: clip a big sturdy bobby-pin through one end of the replacement-cord as a leader--it's a lot easier to pull and push a bobby-pin through a cord-casing than to try to wiggle a cord through without a leader.)
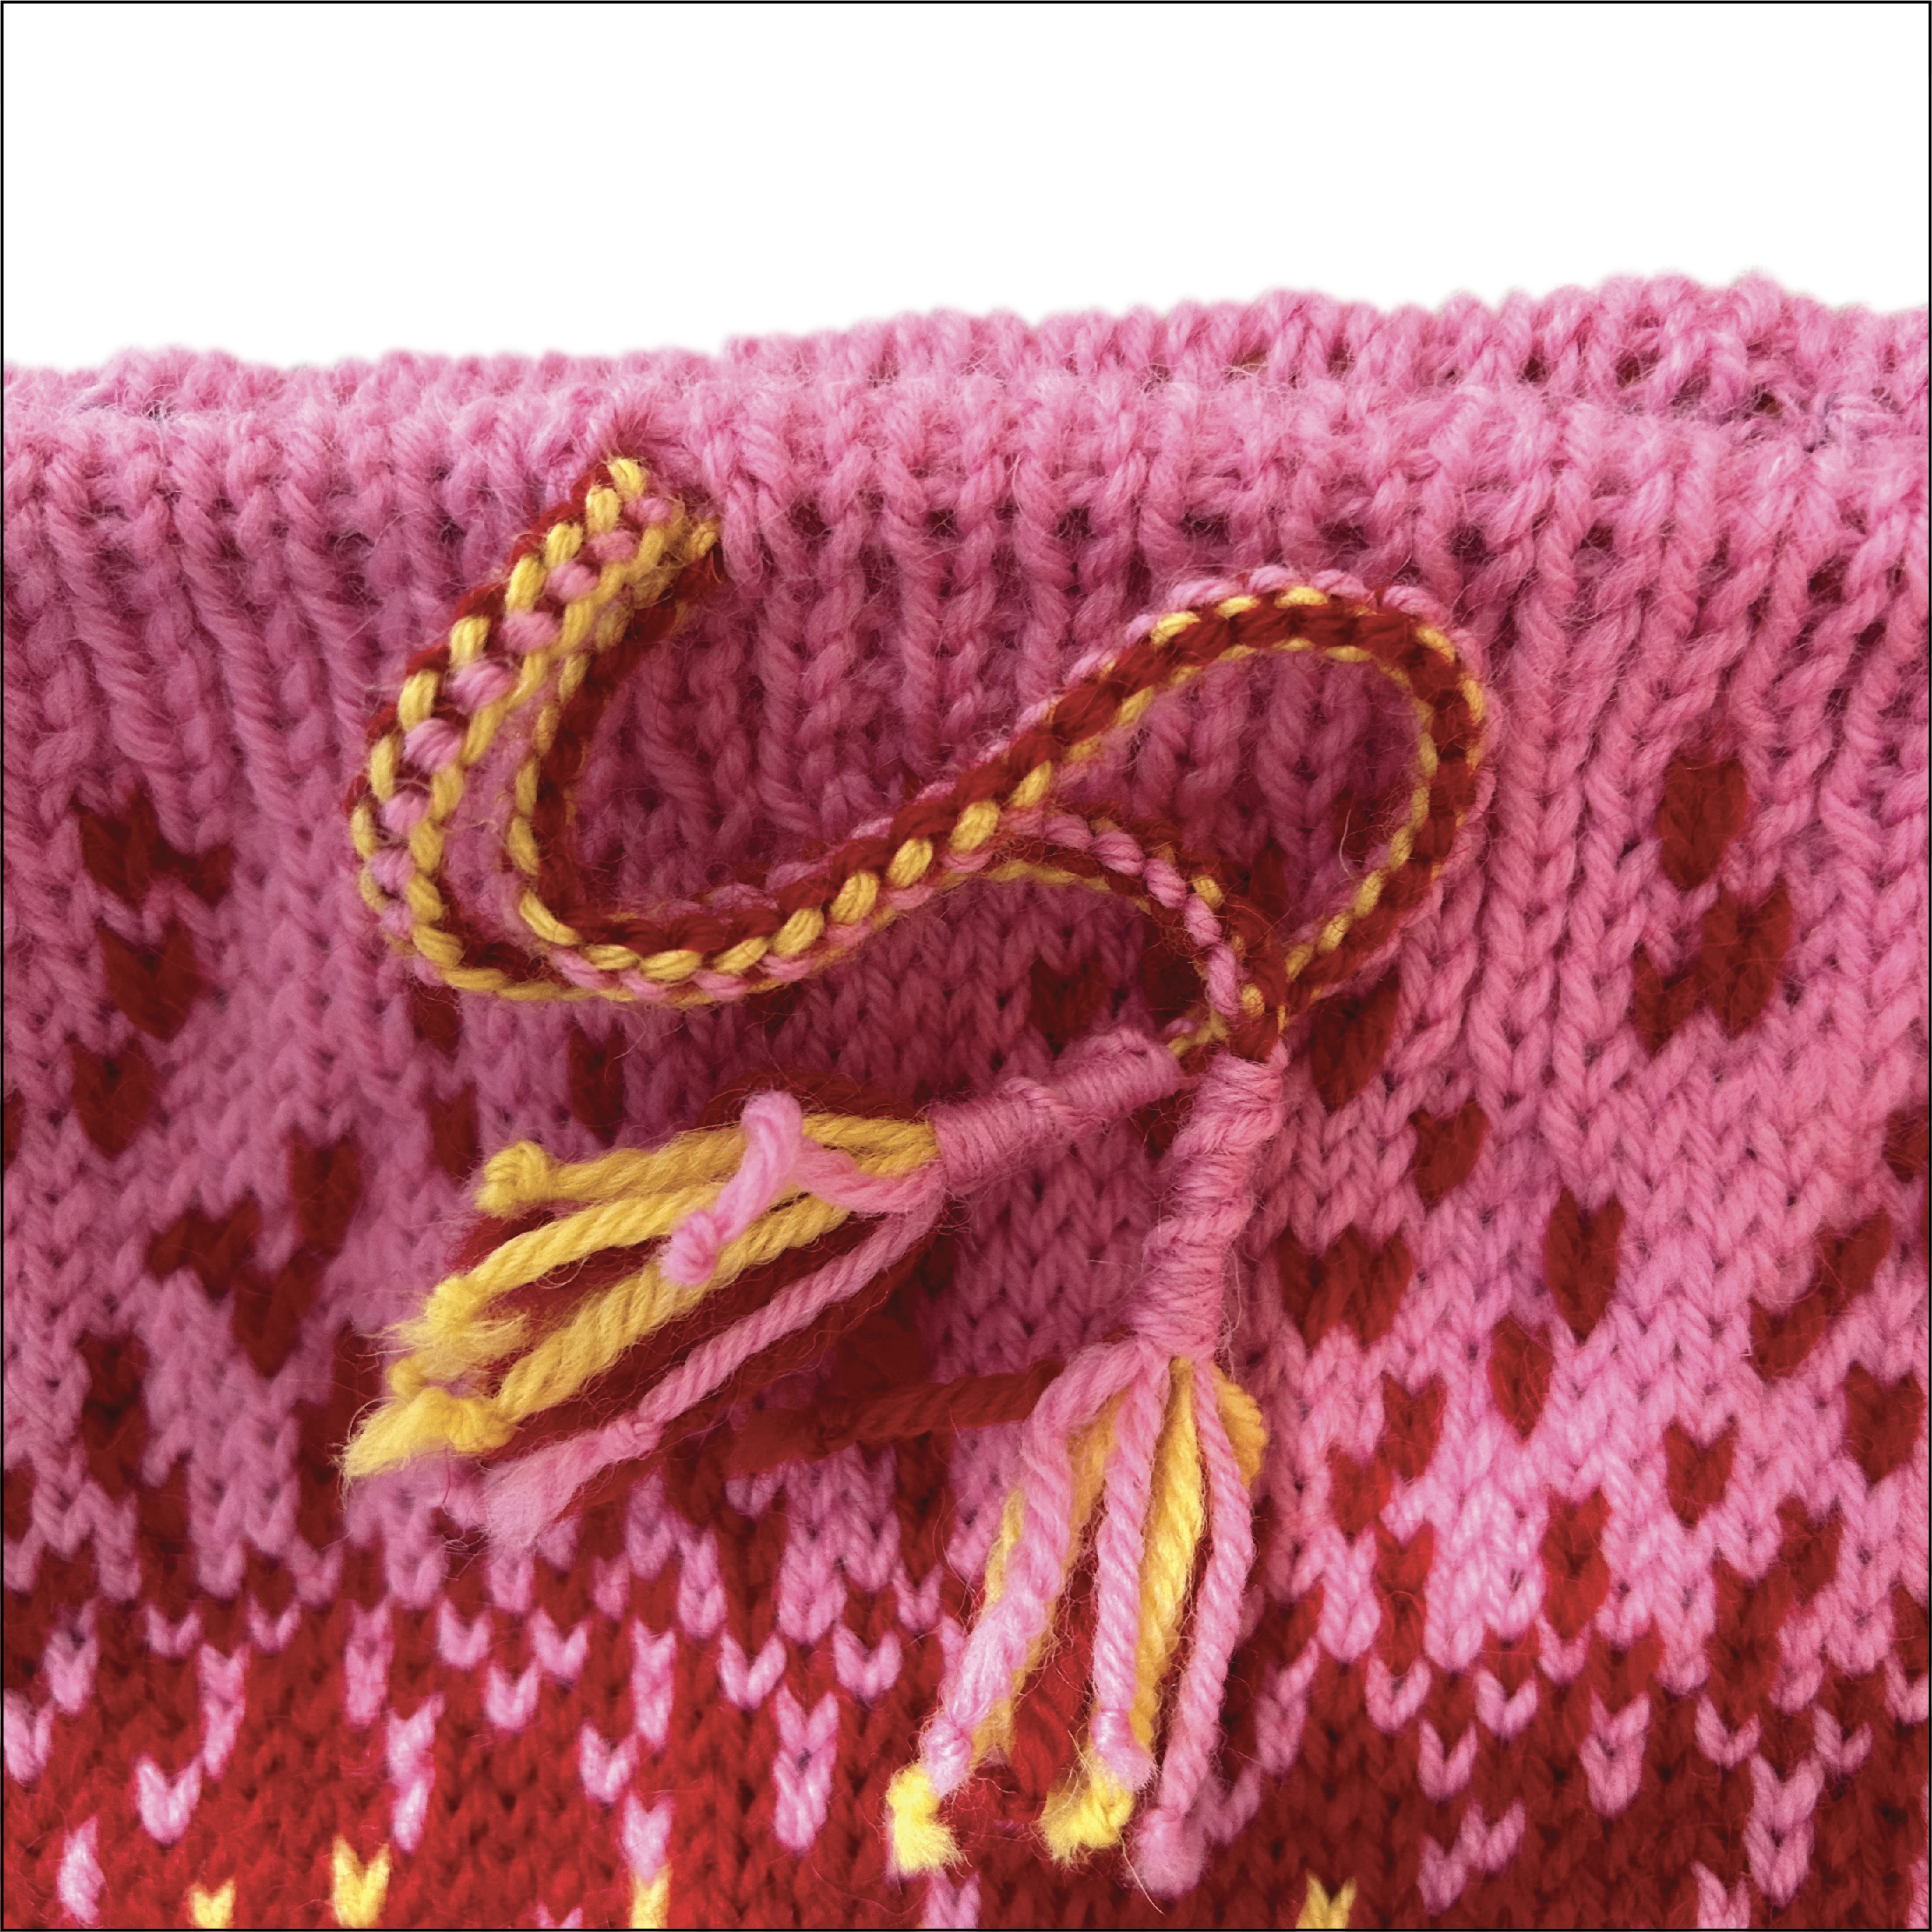 |
| tasseled lanyard on a cowl |
There is another unexpected use for lanyards also: As a decorative cast on, and an exactly matching decorative cast off, and that'll be the subject two posts from now.
Lastly, safety around drawstrings
Cords + little kids = bad, dangerous combo. No cords for baby clothes! Yet little hands can pull drawstrings out of casings on grown-up clothing too. So, consider sewing the cord to the casing on your corded garments. A stitch or two in the center back does not affect how the cord works, but does make the cord un-removable. Now that cord won't come out for mischief or by accident.

Another alternative: make the lanyard cord longer, wiggle it through the casing and fasten the ends together into a circle. Then, scootch the join back into the casing, per below, never to be seen again. This leaves a pretty and smooth stretch of cord as the loop protruding. To tighten, pull up into bunny ears, then wrap one ear over the other in a half-granny knot.

Or, lace a two-hole cord lock onto the cord before joining. Like the bunny-ears, with this trick neither the cord-lock nor the cord itself can be pulled out. Using a cord-lock means less cord to make: the loop protruding can be shorter than with bunny-ears. However, cord locks are a bit rough on cord--maybe save these for thicker and tougher 4-strand lanyard.
The next post in this series is cord endings and beginnings.
The third post in this series is using lanyards as decorative (and matching!) cast-on and cast-off.
--TK
* Circulatory issues? Beware the use of cord OR elastic in socks!

Questions? Feedback? Talk to me about this post on Ravelry TECHknitter forum
or via e-mail (contact on "more info" page, upper right)